Children and adults have always been fascinated, wondering how rainbows form and where to catch the pot of gold. This simple lesson will allow students to make a connection to the real world. 
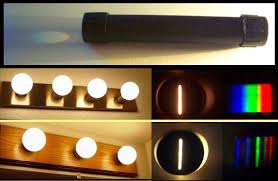
First, start off by using a prism in sunlight to try to refract, or bend and separate light into the different colors of the spectrum, or rainbow. Be patient. You need just the right angle and amount of sunlight! (You may also want to try my refraction lesson first).

Once you can see the rainbow, ask students what colors they see. If you go in order, you should see ROYGBIV (red, orange, yellow, green, blue, indigo, and violet.) These colors have different temperatures and wavelengths, which is why the color with the longest wavelength (red) is at the top of the arc, and why the color with the shortest wavelength (violet) is at the bottom.
 If the prism doesn't work, try a cd or make your own spectroscope (it's super easy!). Once students see this, you can help them get rid of the misconception that light is only white or yellow and is really made of the colors of the spectrum.
 Then I use a spinning color wheel. Students should notice that when the wheel spins fast enough, it appears to be white. They can then make the connection to light.

Next, I give student pairs a flashlight and 3 primary colored color paddles - red, blue, and green. Darken the room and have them observe just red on the flashlight, just blue, then both. Repeat with other colors.


Next, I give student pairs a flashlight and 3 primary colored color paddles - red, blue, and green. Darken the room and have them observe just red on the flashlight, just blue, then both. Repeat with other colors.
- Red + blue light = violet
- Red + green light = yellow
- Blue + green light = cyan
*It is really important to remind students that mixing colors of light is different than mixing paint colors!
Ask students how they think they can make the other colors of the rainbow. Then introduce the materials (whole milk, clear container with water, blue/green/red food coloring, and flashlight). Ask, "What is the recipe for a rainbow in real life?" (Dark clouds filled with water vapor that let sunlight refract/bend off the drops of water). "What do you think the milk represents in our model?" (clouds) "The water?" (water vapor in the clouds) "The flashlights?" (rays of sunlight - remind them that light travels in straight lines but can bend through water)


Have the students pour a tablespoon of whole milk into a clear container of water. Add 3 drops each of red, blue, and green food coloring separately to different sides or corners. Shine the flashlights through the container from different angles and observe from top and side angles. You will first see violet, yellow, and cyan. Then orange will appear.


Want rainbow party ideas? Check out the Party Frosting Blog and check out this cake!
For more light and color materials, check out Steve Spangler's website!
Play this rainbow color sorting game!
Want rainbow party ideas? Check out the Party Frosting Blog and check out this cake!

Check out my website for lesson plans, lab sheets, and more light and shadow websites for teacher and student use.
