Wednesday, August 31, 2011

Setting up the classroom

This is what my classroom looked like last week. I planned on taking more pictures yesterday, but I fell off a chair and bruised my back pretty badly when I hit it on the radiator/shelf and went right home. (Don't we always tell kids not to stand on chairs?!) I'm going to spend a few more hours today after professional development.

To the left are the closets. I don't have a sink :(  The green boards are not chalkboards, they're bulletin boards. Right now there are 24 desks. They were in 2 rows of twelve, too big for me! My class list has 21 right now, so I changed it to 3 sets of 7. I'm really not happy with it, but the room is so narrow I'm not sure I have a choice!

 The previous teacher was moving to a bigger classroom, but hadn't yet...so that's her stuff. My desk is in the top left corner. The bulletin board (which will also be my word wall) is in an alcove with a counter. I moved the kidney table to the back of the room.


My room is pretty small, so it doesn't have a lot of wall space. This is the back of the room. I used table cloths instead of bulletin board paper and borders. My alphabet hasn't been used in 3 years and as you can see, it is on the desk and not on the wall...because it pretty much got ruined when the velcro melted onto other pieces.

Outside of being in the classroom, I am super excited about a few things I ordered from Really Good Stuff:
They're double sided name plates that come with adhesive sleeves. No more taping them to the desks just for the kids to peel it or write on the tape! What I love is that I don't have to worry about covering the multiplication tables when they take a quiz...they can just take the name plate out of the sleeve and flip it to the other side!
Self-adhesive pencil clips...I really hope that this solves the problems of dropped and missing pencils...which is such a pet peeve of mine! Most janitors just sweep them up if I don't find them and pick them up at the end of the day.
I was kind of on the fence about these finger pointers, but since they cost $6.99 for 32, I gave it a shot. I'm really focusing on getting 100% attention 100% of the time. Anyway, they're called martian pointers, but I think everyone thinks they look like witch fingers. I think I might get creeped out by them, but the kids will definitely be into them...at least for a little bit.

I just completed my activity sticks! I am super excited to use them. My prediction is that eventually my students will memorize the activity and its stick color so that they can somewhat easily guess what they are, even though there are a lot of them!

I am finished with my word family egg center too! I just wrote on them with a Sharpie! Some day soon I'll post a list of the families on them so you can easily make your own.

Monday, August 29, 2011

Hurricanes

Here is a set of lesson plans, lab sheets, and websites with simulators on hurricanes. I've used the first 3 pages with second grade and up and the last two pages with students a bit older, but they really can be used for any grade.


Click the pictures to download activities; click the link below for lesson plans


Friday, August 26, 2011

Earthquakes and hurricanes...oh my!

Well, looks like I left NJ just in time! Due to a storm over Minnesota and the Great Lakes, my departure was delayed by 2 hours, meaning I missed my connecting flight and had to wait 8 hours until the next one to San Jose. I also missed the 5.8 earthquake and the impending hurricane will probably delay my flight home on Monday.
I think this is a sign that it's time to post my science lessons. I have a geology unit that includes earthquakes and a weather unit that includes hurricanes. Once I get home and find my flash drive, I'll post them here. Until then, check out my science website and use these interactives with your students:


I'll post specific websites when I put up the lesson plans!

Sunday, August 21, 2011

In September, I will be teaching....

I haven't had my own classroom in 3 years. I taught second grade for 2 years, third for 1 year, basic skills for 1 year, and PreK-5 STEM for 2 years. I am sooo excited to have my own class again! I haven't announced it because I know some of my students don't know I won't be at their school and didn't want to upset them. If you're reading this, I'll miss you!

The only problem is that I can't get into my classroom until August 26! I am going to beg my new principal to let me bring some stuff in tomorrow because I will be in sunny California for a week visiting my best friend and watching some baseball from Tuesday to next Monday! :)
I won't be posting for a week or so, and hopefully when I return I will have 200 sweet followers so I can have a sweet giveaway! We'll see what cool stuff I find out in California for my beach themed classroom to share with you! :)
If you want to get a head start, make sure to:
follow my blog
follow my Facebook page
follow my Pinterest
add my blog to your blogroll

Comments must be left on the giveaway post, not here, to count. However, I looooove comments! Most of my followers are K and 1, so I'd love to see those 2, 3, and 4 blogs catch up so I can get some great ideas from you!

Friday, August 19, 2011

Making Math Memorable #4

My third graders used to participate in the ShopRite Young Consumers program. In addition to meal planning prior to our trip, students also math practiced games with their parents prior to going to the grocery store and participating in games and shopping there.

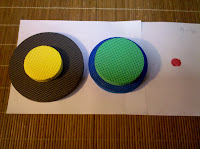
One of our favorites is easy to do. It's called the Tower of Hanoi, but we also call them pancake stacks because it's a grocery program. I don't actually have all of the pieces at home, so I am going to improvise and show you how it's done. You can start with between 4-8 circles of different sizes and a large piece of construction paper with stickers or bingo marker dots if you'd like.
Here's the solution. Look below for step by step pictures!

The objective of the puzzle is to move the entire stack to another rod, obeying the following rules:
  • Only one disk may be moved at a time.
  • Each move consists of taking the upper disk from one of the rods and sliding it onto another rod, on top of the other disks that may already be present on that rod.
  • No disk may be placed on top of a smaller disk.
Start:
Move 3: 
Move 4: 
Move 5: 
Move 7: 
Move 10:
Move 11: 
Move 12: 
Move 13: 
Move 14: 
Move 15: 


Differentiation: Use less circles to make it easier or more to make it harder; have students time themselves with a stopwatch or count and record how many moves it took to complete the game!

See all Making Math Memorable posts: